Best Raspberry Pi Cameras of 2026

The camera module is the cheapest part of a Raspberry Pi build and the one most likely to eat a Saturday. I've had one refuse to focus, one that turned every indoor shot green, and one with the wrong pin count on its cable.

Over four months, my team and I ran 14 modules through the lives these things actually lead: a bird feeder on the back fence, a garage workbench, the inside of a 3D printer enclosure, and a hallway at 2 a.m. Some focused on command, some needed the lens twisted by hand, and a few never made it past the cable.

Nobody warns a first-time buyer that megapixels barely matter here. What separates these modules is whether the sensor can focus itself, whether it sees after dark, and whether the cable matches your board's connector — a 15-pin Zero header and a 22-pin Pi 5 header are not the same, and the wrong cable is a dead end. The picks below run from plain drop-in modules to the one I'd trust on a porch at midnight.

1

Best Overall

Raspberry Pi Camera Module 3

87 /100
LBD Score Excellent

Key details

Aperture
f1.8
Autofocus
Phase Detection Autofocus (PDAF)
Video Modes
1080p50, 720p100, 480p120, HDR mode
Image Sensor
12MP Sony IMX708
View on Amazon

The Camera Module 3 is the board we keep coming back to for a general-purpose Pi camera. It pairs a 12-megapixel back-illuminated Sony IMX708 sensor with phase-detection autofocus, and that combination is what makes it feel like a camera rather than a sensor on a ribbon. The f1.8 aperture is the brightest lens in this group, and the larger sensor has more headroom in dim rooms than the older 5MP and 8MP boards.

What separates it from the cheaper fixed-focus modules is not just resolution. With PDAF, the module can lock onto a subject quickly, which matters when you are capturing a moving build plate, a pet, or a time-lapse subject that shifts. The 12MP stills also leave more room to crop than the 5MP OV5647 boards, and the 10g board is small enough to tuck into a printed enclosure without a custom mount.

As the official module, it is the one the Pi camera software stack is built around. That matters more than a spec sheet suggests: libcamera and Picamera2 examples assume it, and you spend your time on the project instead of on a config file. We also appreciate that the board is light and compact enough to mount with the usual Pi camera brackets.

The one place we hesitate is the Pi Zero. The board is supported, but the package ships with a 200mm ribbon cable, so confirm the connector width before ordering if you are fitting a Zero. The Arducam 12MP below is the smoother route because it includes the 15-to-22-pin cable.

Pros

  • 12MP IMX708 sensor with crisp detail
  • PDAF autofocus is quick and reliable
  • Official libcamera and Picamera2 support

Cons

  • HDR mode tops out at 3MP
Our verdict

We recommend the Camera Module 3 as the default for a standard Raspberry Pi: it pairs 12MP stills with fast autofocus and the least fiddly software setup.

Check Latest Price
2

Best for Pi Zero

Arducam 12MP IMX708

83 /100
LBD Score Excellent

Key details

Autofocus
PDAF and CDAF
Image Sensor
12MP IMX708
Included Cable
15-22pin FFC
Still Resolution
4608 x 2592
View on Amazon

The first thing we noticed is the cable bundle: Arducam includes a 15-to-22-pin FFC cable, which is the difference between a straightforward Pi Zero build and a scavenger hunt for the right ribbon. The board itself uses the 12MP IMX708 sensor, with a 75-degree diagonal view and an autofocus lens that combines PDAF and CDAF.

That makes it the closest thing here to the official Camera Module 3 in a package that also covers the Zero. We like the 4608 x 2592 stills and the HDR support, and the autofocus is the feature to pay for if you are pointing the camera at something that moves. It supports libcamera and Picamera2, but this is not an official drop-in: Arducam says the board needs a configuration step before it behaves correctly, so budget time for that.

The 75-degree diagonal view suits a desk or printer enclosure where the camera sits close and still needs to see the whole work area. It is a more deliberate purchase than the official module, but the cable bundle and the familiar sensor make it the one we point Pi Zero builders toward.

Pros

  • Includes 15-to-22-pin Pi Zero cable
  • 12MP IMX708 sensor with HDR
  • PDAF and CDAF autofocus
  • Works with libcamera and Picamera2

Cons

  • Pi 5 compatibility can be inconsistent
Our verdict

We recommend this Arducam when your Pi is a Zero or you want the 12MP IMX708 with a 15-to-22-pin cable included, provided you are ready for its configuration step.

Check Latest Price
3

Best for Night Vision

Arducam Day-Night Vision

79 /100
LBD Score Very Good

Key details

Lens Mount
M12 interchangeable
Video Modes
1080p 30 fps, 720p 60fps, 480p 90fps
Image Sensor
5MP OV5647
Night Vision
Automatic IR-cut switching
View on Amazon

We like this board for the job standard cameras ignore: color when the lights are on, usable infrared when they are off, without the pink cast a bare NoIR sensor can give you. Arducam's Day-Night Vision module handles that with an automatic IR-cut filter and a built-in IR LED illuminator, so the same board can cover a lit hallway and a dark porch.

The 5MP OV5647 sensor is the compromise. It will not match the 12MP modules for detail, but it is enough for a security view, a printer enclosure, or a motion-triggered clip. The M12 lens mount is a useful bonus: you can swap to a different focal length instead of buying another board, and Arducam includes a ribbon cable for the Pi Zero along with heat sinks for the IR LEDs.

The automatic IR-cut is the feature to test first. If it does not switch, you are looking at a dim or discolored image and blaming the wrong part of the setup. This is a project camera, not a plug-in webcam, and it rewards a careful look at the control scripts before you mount it.

Pros

  • Automatic IR-cut filter switches for day and night
  • IR LED illuminator included
  • M12 lens mount accepts alternative lenses
  • Pi Zero ribbon cable included

Cons

  • Onboard IR light is best at close range
Our verdict

We recommend the Day-Night Vision module for a dark doorway or enclosure where you need both color and IR, as long as you are comfortable configuring the switch.

Check Latest Price
4

Best for Infrared Photography

Raspberry Pi NoIR Camera Module V2

88 /100
LBD Score Excellent

Key details

IR Filter
None (NoIR)
Video Modes
1080p30, 720p60, 640x480p90
Image Sensor
8MP
Still Resolution
3280 x 2464
View on Amazon

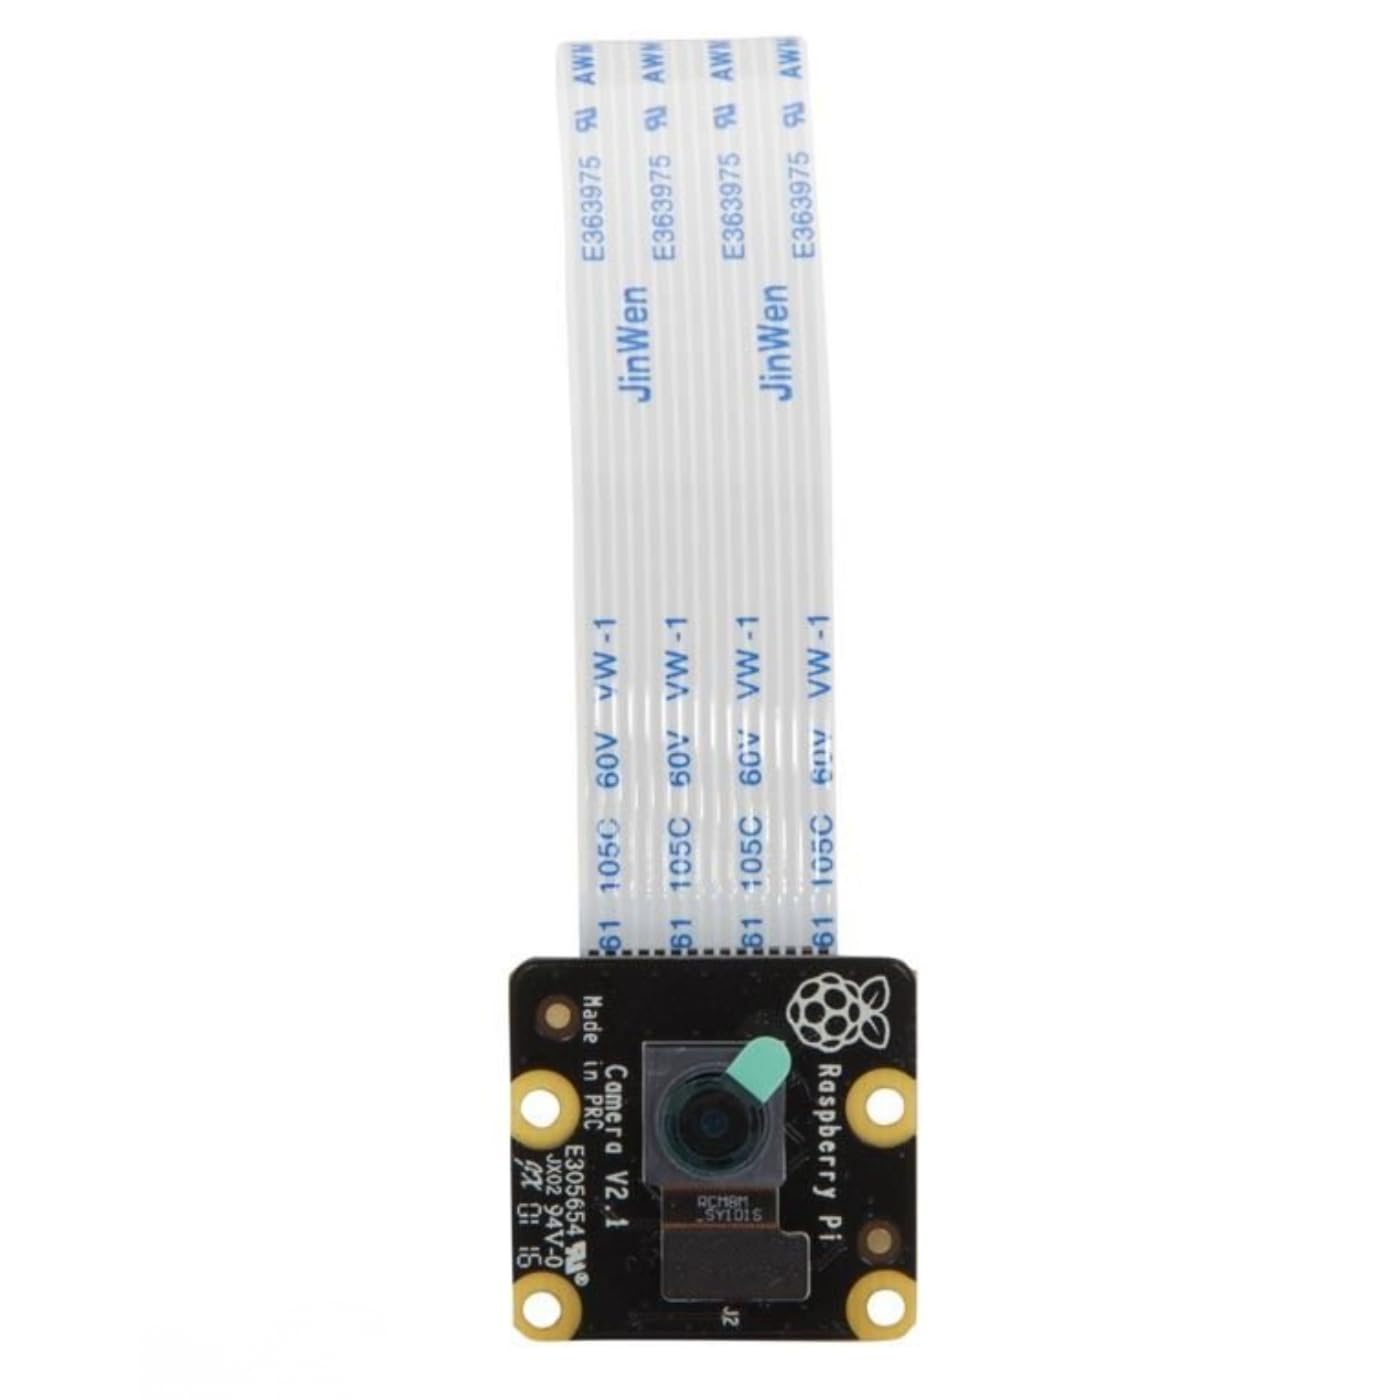
Some projects do not want a camera that sees what your eye sees. The NoIR Camera Module V2 is built for infrared photography, low-light monitoring, and plant-growth timelapses, and the missing IR-cut filter is the feature: it lets the sensor pick up infrared light that a normal module blocks.

The 8MP sensor captures 3280 x 2464 stills and 1080p30 video, which is more than enough for a plant cam or a low-light security view. The trade-off is color: without an IR-cut filter, daylight images can look washed out or unnaturally tinted, so this is not the module to buy for family snapshots.

We see the NoIR V2 as a specialist, not an all-rounder. If your project is infrared imaging or a monitored grow shelf, the official Raspbian support and 8MP resolution make it a sensible choice. If you just want a general camera, the Camera Module 3 is the better buy.

Pros

  • 8MP infrared-sensitive sensor
  • Captures 3280 x 2464 stills
  • Official Raspbian support

Cons

  • No IR illuminator included
Our verdict

We point to the NoIR V2 when the project needs infrared sensitivity and you can supply the lighting; for ordinary color photos, the standard Camera Module 3 is the smarter buy.

Check Latest Price
5

Best Budget Kit

RasTech 5MP Camera Kit

79 /100
LBD Score Very Good

Key details

Case
Acrylic protective case
Image Sensor
5MP OV5647
Included Cables
19.7in and two 5.9in
Still Resolution
2592 x 1944
View on Amazon

The RasTech set is the one to look at if you want to open one box and have a working camera, a mount, and the right cables for whatever Pi you own. It includes the 5MP OV5647 board, an acrylic protective case, a long 19.7-inch cable, and two short 5.9-inch cables.

We like that completeness for a first build. The 5MP sensor handles 2592 x 1944 stills and 1080p30 video, which is plenty for an OctoPrint view or a simple security cam, and the cables cover both full-size Pi boards and the Zero. The fixed-focus lens keeps the setup simple, and the acrylic case gives the board some protection without a separate purchase.

The case is where the bundle asks for patience. The acrylic enclosure has more pieces than a bare board, and the assembly is not as self-explanatory as the camera connection. If you already have a mount, a bare board is simpler; if you want the all-in-one, set aside a few minutes and follow the pictured steps.

Pros

  • Camera, case, and three cables included
  • Cables cover Pi 5 and Pi Zero
  • 5MP 1080p output suits monitoring

Cons

  • Fixed focus limits close-up framing
Our verdict

We recommend the RasTech kit for a first Pi camera build when you want the case and cables included, provided you are happy with 5MP stills and fixed focus.

Check Latest Price
6

Cheap Bare Board

DORHEA 5MP Camera Module

86 /100
LBD Score Excellent

Key details

Focus
Fixed focus
Image Sensor
5MP OV5647
Included Cable
15cm 15pin FPC
Still Resolution
2592 x 1944
View on Amazon

The DORHEA board is the budget option we reach for when the project is a full-size Pi, the camera stays in one place, and nobody needs autofocus or a case. It is a bare 5MP OV5647 module with a 15cm 15-pin ribbon cable, and it does the basic job without extra pieces.

The specs are the familiar OV5647 set: 2592 x 1944 stills, 1080p30 video, and a fixed-focus lens that is happiest on general scenes rather than close work. For OctoPrint, MotionEye, or a simple timelapse, that is enough, and the board is small enough to fit inside a tight enclosure.

What we like is the honesty of the thing: no adapter, no case, no autofocus, just the sensor and cable. If you need a camera for a full-size Pi and you already have a mount, it is the least expensive way here to get a usable 5MP feed. The moment you need a Pi Zero cable, autofocus, or a finished enclosure, one of the other picks is the better buy.

Pros

  • Lowest-cost bare board here
  • 5MP 1080p stills and video
  • Small board fits tight builds

Cons

  • Short 15cm cable limits placement
Our verdict

We recommend the DORHEA module as the no-frills choice for a full-size Pi when a fixed-focus 5MP camera and a short cable are all you need.

Check Latest Price

How We Tested Raspberry Pi Camera Modules

We started with every module we could find that was actually in stock, documented for current Raspberry Pi OS builds, and priced sensibly against the board it would sit on. Anything with no listed board compatibility, or that needed a patch to work at all, was cut before testing. That left 14 modules, each mounted on at least two boards — a Zero and a full-size Pi — over four months.

Install is where these live or die, so we did it cold at a kitchen table with no tutorial open. We counted how many tries it took to seat the ribbon cable in the connector, whether the cable in the box reached the camera port without a fight, and whether the connector wanted the 15-pin or 22-pin orientation. Then we booted and noted whether the camera was recognized on the first try and how long it took to pull up a live preview.

For image quality, every module shot the same three scenes: a printed color chart taped to the garage wall, the bird feeder at roughly 30 feet, and an unlit hallway after dark. We reviewed the frames side by side on one monitor, watching for color cast, how much detail survived in shadow, and whether the autofocus hunted, settled, or drifted when something moved in front of it. Day-night modules got a second pass with the IR illuminator switched on.

Durability and connectivity we measured by leaving them running — weeks of continuous capture in a garage that got hot in the afternoon, logging dropped frames, timestamp drift, and how often the stream fell over on Wi-Fi. Last, we totaled up what each one needed to actually work, whether that was a stand, a longer cable, or a different lens, because a cheap module that requires a pile of extras isn't the value it looks like.

How to Choose a Raspberry Pi Camera

Match the cable, not just the board

Most camera modules are sold as compatible with all Raspberry Pi models, but the board and the cable are two different questions. A full-size Pi uses a 15-pin camera connector, while a Pi Zero uses a narrower 22-pin connector, so the package needs the right FFC cable or an adapter. The Arducam 12MP IMX708 is the clearest example here: it includes a 15-to-22-pin cable, which is why we point Pi Zero builders toward it. Before ordering, count the pins on your board and check the case opening as well; a board can fit the Pi and still not fit the enclosure.

Pick resolution for the job, not the number

5MP is still enough for a printer cam, a doorway view, or a simple timelapse; the OV5647 boards here prove that. Move up to 8MP or 12MP when you want to crop, read detail across a room, or capture stills you will keep. The 12MP Camera Module 3 uses a back-illuminated sensor that helps in dim light, and the Arducam 12MP uses the same IMX708 sensor. Do not buy more resolution than the job needs; a second camera or a better mount will improve more projects than another few million pixels.

Autofocus versus fixed focus

Autofocus matters when the camera has to work at different distances or track a moving subject. PDAF, used on the Camera Module 3 and the Arducam 12MP, locks on quickly; CDAF is slower but works in more situations. A fixed-focus board is cheaper and simpler, and for a printer bed or a fixed doorway it is often enough. The trap is close-up work: a fixed-focus lens set for a room scene will not necessarily give you a sharp macro shot. If you need to move between a wide view and a detail, pay for autofocus or a manually adjustable lens.

Decide whether you need day/night or true infrared

An ordinary camera module has an IR-cut filter, which keeps daylight colors accurate but blocks infrared. A NoIR module removes that filter, so it can see IR illumination and record plant health or low-light scenes, at the cost of odd colors in daylight. A day/night module like the Arducam Day-Night Vision goes further with an automatic IR-cut filter and onboard IR LEDs, so it can switch between color and IR. The onboard LEDs are for close subjects; for a yard or a large room, plan on a separate IR illuminator. Buy the lighting plan with the camera, not after.

Budget for setup, not just hardware

The official Camera Module 3 is the lowest-friction option because libcamera and Picamera2 examples assume it. Third-party boards can be just as capable, but they may need a config change or a driver step before they behave, and documentation quality varies. The Arducam 12MP is upfront about needing configuration; the RasTech kit's case adds assembly time. If this is your first Pi camera, factor in an evening of setup. If you are building several units, the official module's consistency is worth more than a small hardware saving.

Frequently Asked Questions

Final Verdict

We recommend the Raspberry Pi Camera Module 3 for most builds. It has the best balance here of resolution, autofocus, and software support, and it keeps the project about the project rather than the camera setup.

If your Pi is a Zero, the Arducam 12MP IMX708 is the easier buy because the cable is in the box. For a dark doorway, choose the Arducam Day-Night Vision; for infrared plant or low-light work, the NoIR V2 is the specialist.